How to secure Apache2 webserver with SSL
Nowadays every major website operates over HTTPS, aka have that little padlock next to the URL in our browsers. It means that we can establish a secure connection with the webserver, and all of the traffic is encrypted. In this port I’m going to describe step-by-step how we can create our own certificate with the openssl utility and configure Apache2 to use HTTPS instead of the default HTTP protocol. It’s worth noting that SSL is an outdated protocol, now we use TLS, still we often say SSL to refer to TLS, which can by confusing.
Step 1: Create a private key
We’re using asymmetric encryption, so besides the certificate we also need a private key. With this command below we create our private key:
viktor@RPI3:/etc/apache2 $ sudo openssl genpkey -algorithm rsa -pkeyopt rsa_keygen_bits:2048 -out ./mytestsite.com.key
As a common security practice, we apply mode 600 to the file which contains our private key, so that only the root user can read this file.
viktor@RPI3:/etc/apache2 $ sudo chmod 600 mytestsite.com.key
Step 2: Create a Certificate Signing Request (CSR)
viktor@RPI3:/etc/apache2 $ sudo openssl req -new -key ./mytestsite.com.key -out mytestsite.com.csr
We need to create a CSR and send it to a Certificate Authority (CA) to sign, or validate our CSR.
Since this is an example we’re going to sign it ourselves, so this will become a self-signed certificate eventually.
Step 3.1: Create a self-signed certificate
We’re generating an x509 (self-signed) certificate from our private key and the CSR created before.
viktor@RPI3:/etc/apache2 $ sudo openssl x509 -req -days 365 -in ./mytestsite.com.csr -signkey ./mytestsite.com.key -out ./mytestsite.com.crt
Signature ok
subject=C = HU, ST = State-Name, L = City-Name, O = Company-Name, OU = Organization-Name, CN = mytestsite.com, emailAddress = test@mytestsite.com
Getting Private key
viktor@RPI3:/etc/apache2 $ ls -l | grep mytestsite
-rw-r--r-- 1 root root 1391 Jan 28 14:42 mytestsite.com.crt
-rw-r--r-- 1 root root 1171 Jan 28 14:35 mytestsite.com.csr
-rw------- 1 root root 1704 Jan 28 14:17 mytestsite.com.key
We don’t need the CSR anymore, we have a (self-)signed certificate and a private key, we can now configure Apache to operate over HTTPS.
Step 3.2: Create a self-signed certificate with one command
We could’ve skip the first and the second steps if we decided to create a self-signed certificate anyway, but normally this is the process we’ve to go through if we want to have signed our CSR by a provider. But by skipping the CSR we could’ve issued this command:
viktor@RPI3:/etc/apache2 $ sudo openssl req -x509 -nodes -days 365 -newkey rsa:2048 -keyout ./alt_privatekey.key -out ./alt_certificate.crt
By issuing this command we create a new private key as well as a self-signed certificate, we don’t need to generate a CSR, but the result is the same. In the following sections we’re going to use the private key and the certificate created in the first and 3.1 section.
Step 4: Configure the apache2 webserver
We edit the following default apache2 configuration file and modify the following options:
viktor@RPI3:/etc/apache2 $ sudo nano /etc/apache2/sites-available/default-ssl.conf
SSLEngine on
SSLCertificateFile /etc/apache2/mytestsite.com.crt
SSLCertificateKeyFile /etc/apache2/mytestsite.com.key
By default SSL in not enabled with Apache, as it can be seen in output of the following command, Apache listens only on the regular HTTP port 80:
viktor@RPI3:/etc/apache2 $ sudo ss -tupln | grep apache
tcp LISTEN 0 511 *:80 *:* users:(("apache2",pid=648,fd=4),("apache2",pid=646,fd=4),("apache2",pid=645,fd=4))
We need to enable the SSL module as well as the default-ssl virtual webserver which is listening on TCP port 443.
viktor@RPI3:/etc/apache2 $ sudo a2enmod ssl
viktor@RPI3:/etc/apache2 $ sudo a2ensite default-ssl.conf
viktor@RPI3:/etc/apache2 $ sudo apachectl configtest
AH00558: apache2: Could not reliably determine the server's fully qualified domain name, using 127.0.0.1. Set the 'ServerName' directive globally to suppress this message
Syntax OK
viktor@RPI3:/etc/apache2 $ sudo systemctl restart apache2
Now as expected we’re listening on both port 80 and 443:
viktor@RPI3:/etc/apache2 $ sudo ss -tupln | grep apache
tcp LISTEN 0 511 *:80 *:* users:(("apache2",pid=4097,fd=4),("apache2",pid=4096,fd=4),("apache2",pid=4095,fd=4))
tcp LISTEN 0 511 *:443 *:* users:(("apache2",pid=4097,fd=6),("apache2",pid=4096,fd=6),("apache2",pid=4095,fd=6))
Now we can open our browser and visit the website over HTTPS. It displays a warning message first stating that the website doesn’t have a valid certificate, and the browser couldn’t verify its authenticity. Since it’s a self-signed certificate and we trust our webserver we can proceed.
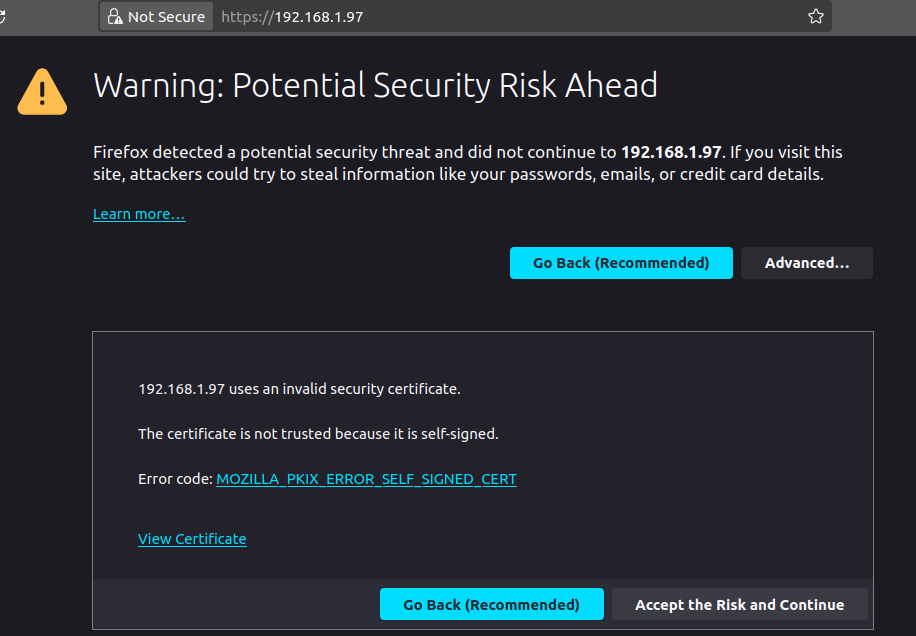
Normally this warning message won’t be displayed of course, if a verified CA signs your certificate.